Hyperledger Explorer 部署
Hyperledger Explorer 是一款简单,功能强大,易于使用且易于维护的开源浏览器,目的是为了能够监控链码、查看区块、调用链码等,这个项目目前还在发展中,所能支持的功能有限,目前版本(release-3.8)只支持查询功能,能够查看网络组成、区块、交易内容、链码、通道信息等。
fabric-samples & hyperledger-explorer
先通过结合first-network网络来部署hyperledger-explorer,先参考Hyperledger Fabric (一) — 超级账本使用fabric-first-network教程启动一个fabric-first-network,建议版本为v1.2.0、v1.2.1,1.3版本待测试
安装基础软件
本次实验基于CentOS7,Ubuntu系统类似
- nodejs 8.11.x (对于版本9.x还不支持)
- PostgreSQL 9.5 以上
- Jq (yum install jq -y)
- docker 17.06.2-ce [https://www.docker.com/community-edition]
- docker-compose 1.14.0 [https://docs.docker.com/compose/]
1. CentOS 安装nodejs
wget https://nodejs.org/dist/v8.11.0/node-v8.11.0-linux-x64.tar.gz

tar zxvf node-v8.11.0-linux-x64.tar.gz && cd node-v8.11.0-linux-x64/bin/ && ls -a

cp node npm /usr/bin

./npm install npm@6.4.1 -g
查看nodejs版本
node -v

v8.11.0
查看npm版本
npm -v

6.4.1
如果需要npm更新版本
npm i -g npm 或者 npm i -g npm@6.4.1
如果需要更新nodejs版本
npm i n -g
n stable  或者  n v8.12.0
2.1 CentOS 安装PostgreSQL (可选一)
进入官网:https://www.postgresql.org ,选择 Download -> CentOS -> Select Version ,这边演示版本 9.6
Install the repository RPM:
yum install https://download.postgresql.org/pub/repos/yum/9.6/redhat/rhel-7-x86_64/pgdg-centos96-9.6-3.noarch.rpm
Install the client packages:
yum install postgresql96
Optionally install the server packages:
yum install postgresql96-server postgresql96-contrib
postgresql96-server - 数据库核心服务端
postgresql96-contrib - 附加第三方扩展
postgresql96-devel - C语言开发Header头文件和库
Optionally initialize the database and enable automatic start:
/usr/pgsql-9.6/bin/postgresql96-setup initdb
systemctl enable postgresql-9.6
systemctl start postgresql-9.6
# 开放防火墙
firewall-cmd --add-service=postgresql --permanent
firewall-cmd --reload
设置postgresql密码
sudo -u postgres psql -c "ALTER USER postgres PASSWORD 'postgres';"
2.2 使用docker-compose安装PostgreSQL(可选二,建议)
在任意处创建目录pg
mkdir -p pg && cd pg
在这个目录下创建并编辑文件postgresql.yaml
vim postgresql.yaml
内容
version: '3.1'

services:

  db:
    image: postgres
    restart: always
    container_name: fabric.postgres.db
    environment:
        POSTGRES_PASSWORD: postgres
    ports:
        - 5432:5432

  adminer:
    image: adminer
    restart: always
    ports:
        - 9090:8080
保存之后启动容器
docker-compose -f postgresql.yaml up -d

Creating network "pg_default" with the default driver
Creating fabric.postgres.db ... done
Creating pg_adminer_1 ...
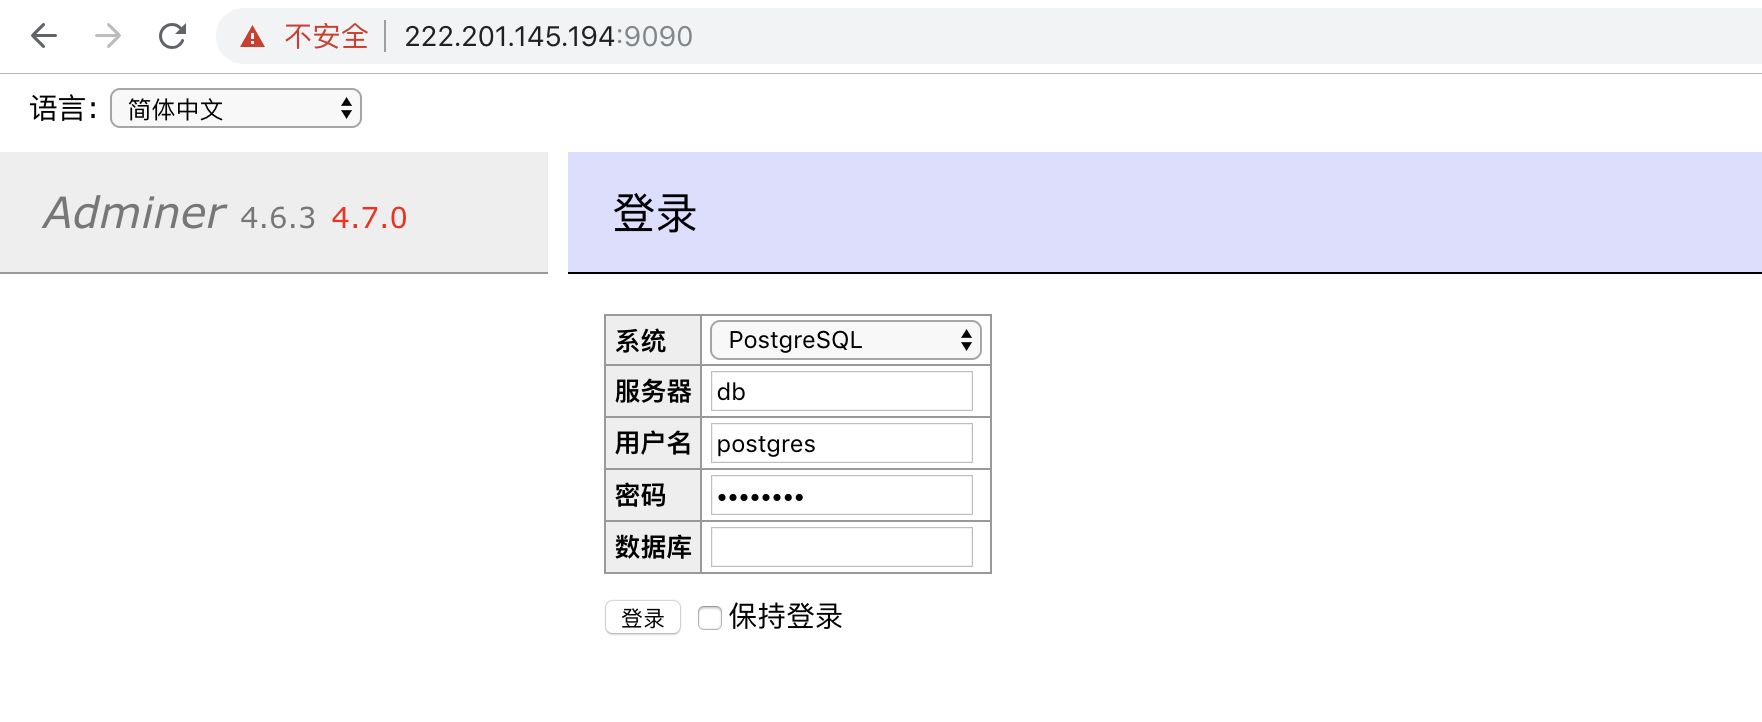
这个时候postgresql服务暴露在端口5432,同时在端口9090有一个数据库可视化管理工具adminer
docker ps

CONTAINER ID        IMAGE      COMMAND                  CREATED                 PORTS               NAMES
2b86d6244e8c        postgres   "docker-entrypoint.s…"   2 hours ago    0.0.0.0:5432->5432/tcp   fabric.postgres.db
6ab723977140        adminer    "entrypoint.sh docke…"   2 hours ago    0.0.0.0:9090->8080/tcp   pg_adminer_1_920204f95ca8
下载代码
创建目录,非必须
mkdir -p /data/pg/ && cd /data/pg
下载hyperledger-explorer代码,版本切换到release-3.6
git clone https://github.com/hyperledger/blockchain-explorer.git && cd blockchain-explorer
切换版本
git branch -a && git fetch origin && git checkout release-3.6 && git branch

  master
* release-3.6
  remotes/origin/HEAD -> origin/master
  remotes/origin/code-formatting
  remotes/origin/development
  remotes/origin/discovery
  remotes/origin/fab-1.2-integration
  remotes/origin/master
  remotes/origin/react
  remotes/origin/reactbranch
  remotes/origin/rearchitects-react
  remotes/origin/reducks
  remotes/origin/release-3
  remotes/origin/release-3.1
  remotes/origin/release-3.2
  remotes/origin/release-3.3
  remotes/origin/release-3.4
  remotes/origin/release-3.5
  remotes/origin/release-3.6
  remotes/origin/release-3.7
  remotes/origin/release-3.8
M       app/persistence/fabric/postgreSQL/db/createdb.sh
M       app/persistence/fabric/postgreSQL/db/explorerpg.sql
M       app/persistence/fabric/postgreSQL/db/processenv.js
M       app/persistence/fabric/postgreSQL/db/updatepg.sql
M       app/platform/fabric/config.json
M       client/package-lock.json
Already on 'release-3.6'
  master
* release-3.6
创建数据库表
进入到创建数据库表的目录
cd blockchain-explorer/app/persistence/fabric/postgreSQL/db
如果在安装PostgreSQL是采用2.2方式,那么需要修改createdb.sh
mv createdb.sh createdb.sh.bak && vim createdb
内容改为
#!/bin/bash


echo "Copying ENV variables into temp file..."
node processenv.js
if [ $( jq .DATABASE_USERNAME /tmp/process.env.json) == null ]; then
  export USER=$( jq .postgreSQL.username ../../../../explorerconfig.json )
else
  export USER=$( jq .DATABASE_USERNAME /tmp/process.env.json)
fi
if [ $(jq .DATABASE_DATABASE /tmp/process.env.json) == null ]; then
  export DATABASE=$(jq .postgreSQL.database ../../../../explorerconfig.json )
else
  export DATABASE=$(jq .DATABASE_DATABASE /tmp/process.env.json)
fi
if [ $(jq .DATABASE_PASSWORD /tmp/process.env.json) == null ]; then
  export PASSWD=$(jq .postgreSQL.passwd ../../../../explorerconfig.json | sed "y/\"/'/")
else
  export PASSWD=$(jq .DATABASE_PASSWORD /tmp/process.env.json |  sed "y/\"/'/")
fi
echo "USER=${USER}"
echo "DATABASE=${DATABASE}"
echo "PASSWD=${PASSWD}"
if [ -f /tmp/process.env.json ] ; then
    rm /tmp/process.env.json
fi
echo "Executing SQL scripts..."
case $OSTYPE in
darwin*) psql postgres -v dbname=$DATABASE -v user=$USER -v passwd=$PASSWD -f ./explorerpg.sql ;
psql postgres -v dbname=$DATABASE -v user=$USER -v passwd=$PASSWD -f ./updatepg.sql ;;
linux*) docker run -it --network pg_default -v /data/pg/blockchain-explorer/app/persistence/fabric/postgreSQL/db:/db --rm --link fabric.postgres.db:postgres postgres psql -h postgres -U postgres -v dbname=$DATABASE -v user=$USER -v passwd=$PASSWD -f /db/explorerpg.sql ;
docker run -it --network pg_default -v /data/pg/blockchain-explorer/app/persistence/fabric/postgreSQL/db:/db --rm --link fabric.postgres.db:postgres postgres psql -h postgres -U postgres -v dbname=$DATABASE -v user=$USER -v passwd=$PASSWD -f /db/updatepg.sql ;;
esac
设置权限
mv createdb createdb.sh && chmod +x createdb.sh
执行脚本创建数据库
./createdb.sh
期间会有两次密码输入,密码都是postgres
配置fabric
进入到fabric配置目录
cd blockchain-explorer/app/platform/fabric
默认目录下的config.json文件中所有的密钥、证书路径都是以fabric-path替代的,因此需要替换成对应fabric-samples的路径,替换方式如下
vim config.json
输入:,接下来输入
%s/fabric-path/\/opt\/gopath\/src\/github.com\/hyperledger
得到内容
{
  "network-configs": {
    "network-1": {
      "version": "1.0",
      "clients": {
        "client-1": {
          "tlsEnable": true,
          "organization": "Org1MSP",
          "channel": "mychannel",
          "credentialStore": {
            "path": "./tmp/credentialStore_Org1/credential",
            "cryptoStore": {
              "path": "./tmp/credentialStore_Org1/crypto"
            }
          }
        }
      },
      "channels": {
        "mychannel": {
          "peers": {
            "peer0.org1.example.com": {}
          },
          "connection": {
            "timeout": {
              "peer": {
                "endorser": "6000",
                "eventHub": "6000",
                "eventReg": "6000"
              }
            }
          }
        }
      },
      "organizations": {
        "Org1MSP": {
          "mspid": "Org1MSP",
          "fullpath": false,
          "adminPrivateKey": {
            "path":
              "/opt/gopath/src/github.com/hyperledger/fabric-samples/first-network/crypto-config/peerOrganizations/org1.example.com/users/Admin@org1.example.com/msp/keystore"
          },
          "signedCert": {
            "path":
              "/opt/gopath/src/github.com/hyperledger/fabric-samples/first-network/crypto-config/peerOrganizations/org1.example.com/users/Admin@org1.example.com/msp/signcerts"
          }
        },
        "Org2MSP": {
          "mspid": "Org2MSP",
          "adminPrivateKey": {
            "path":
              "/opt/gopath/src/github.com/hyperledger/fabric-samples/first-network/crypto-config/peerOrganizations/org2.example.com/users/Admin@org2.example.com/msp/keystore"
          }
        },
        "OrdererMSP": {
          "mspid": "OrdererMSP",
          "adminPrivateKey": {
            "path":
              "/opt/gopath/src/github.com/hyperledger/fabric-samples/first-network/crypto-config/ordererOrganizations/example.com/users/Admin@example.com/msp/keystore"
          }
        }
      },
      "peers": {
        "peer0.org1.example.com": {
          "tlsCACerts": {
            "path":
              "/opt/gopath/src/github.com/hyperledger/fabric-samples/first-network/crypto-config/peerOrganizations/org1.example.com/peers/peer0.org1.example.com/tls/ca.crt"
          },
          "url": "grpcs://localhost:7051",
          "eventUrl": "grpcs://localhost:7053",
          "grpcOptions": {
            "ssl-target-name-override": "peer0.org1.example.com"
          }
        },
        "peer1.org1.example.com": {
          "url": "grpcs://localhost:8051"
        },
        "peer0.org2.example.com": {
          "url": "grpcs://localhost:9051"
        },
        "peer1.org2.example.com": {
          "url": "grpcs://localhost:10051"
        }
      },
      "orderers": {
        "orderer.example.com": {
          "url": "grpcs://localhost:7050"
        }
      }
    },
    "network-2": {}
  },
  "configtxgenToolPath": "/opt/gopath/src/github.com/hyperledger/fabric-samples/bin",
  "license": "Apache-2.0"
}
然后保存
Build 浏览器
进入到blockchain-explorer目录,一次执行如下命令
cd blockchain-explorer
npm install
cd app/test
npm install
npm run test
cd ../../client/
npm install
npm test -- -u --coverage
npm run build
在执行过程中,进入到client目录之后执行npm test -- -u --coverage的时候有可能会出现一个错误,可以忽略,如果一切正常会得到如下执行结果
Test Suites: 26 passed, 26 total
Tests:       171 passed, 171 total
Snapshots:   0 total
Time:        10.789s
Ran all test suites.
...
这个build过程中可能会遇到一些问题,可以尝试删除node_modules、package-lock.json来重新操作。
启动 hyperledger-explorer
如果之前的步骤都顺利完成了,那么接下来便可以启动浏览器了。由于官方提供了两种启动模式,一种是host,一种是local,这个可以通过编辑app目录下的explorerconfig.json来配置,对于sync模式,一般是说多个同步进程在不同的节点位置上,也就是在分布式环境下部署浏览器,则需要采用sync模式,如果是本地docker环境,则采用local模式即可。
在sync模式下,确保每一个节点上的配置信息一样
 "sync": {
    "type": "host"
 }
Local模式
 "sync": {
    "type": "local"
 }
启动浏览器
cd blockchain-explorer/
./start.sh (it will have the backend up).
接下来访问 http://localhost:8080 即可
停止浏览器服务
./stop.sh (it will stop the node server).
如果是sync模式
cd blockchain-explorer/

./syncstart.sh (it will have the sync node up). [Note : pass network-id and client-id to start specific client sync
process, else first network and client will be considered]
停止服务
./syncstop.sh (it will stop the sync node).
启动之后界面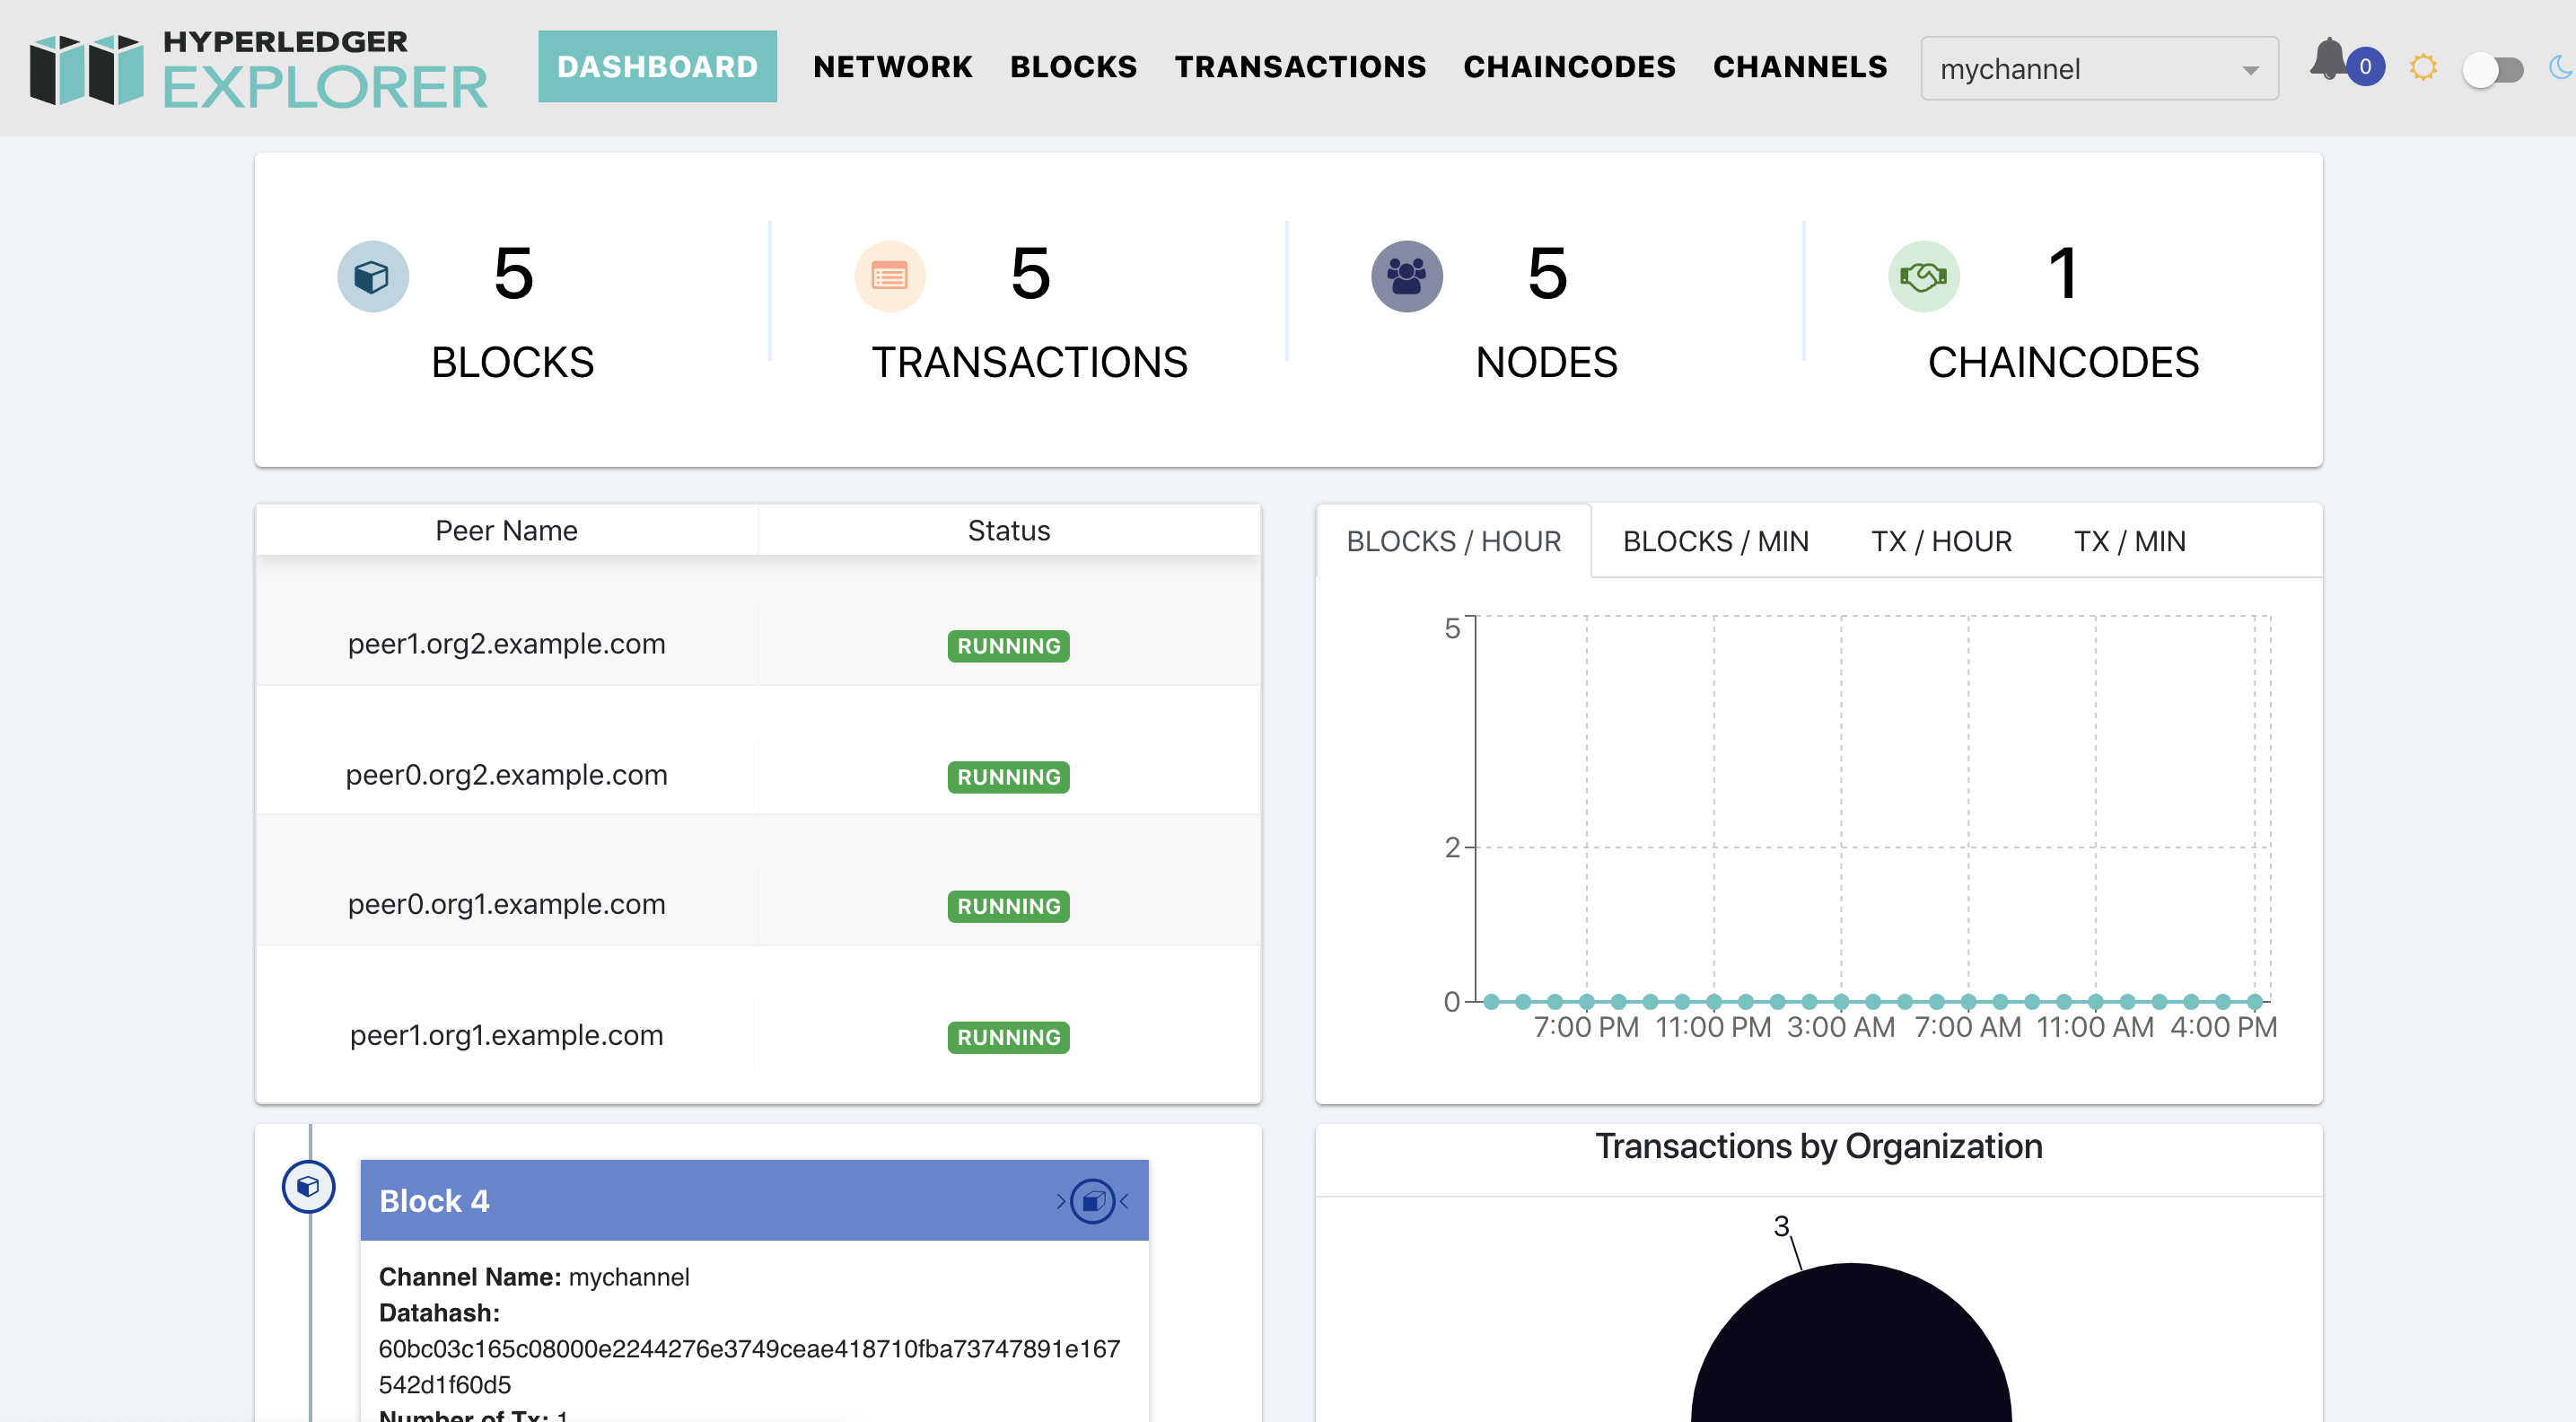
结
hyperledger浏览器还是偏简单,目前社区还在更新中,从hyperledger的官方网站:https://www.hyperledger.org/projects/explorer 中可以看到对浏览器的愿景:
Hyperledger Explorer is a blockchain module and one of the Hyperledger projects hosted by The Linux Foundation. Designed to create a user-friendly Web application, Hyperledger Explorer can view, invoke, deploy or query blocks, transactions and associated data, network information (name, status, list of nodes), chain codes and transaction families, as well as any other relevant information stored in the ledger. Hyperledger Explorer was initially contributed by IBM, Intel and DTCC.