安装v2ray
bash <(curl -L -s https://install.direct/go.sh)
systemctl status v2ray
配置v2ray
具体的做法和另一篇文章《搭建v2ray》一样,只是其中的配置文件替换为用websocket,如下
{
  "log" : {
    "access": "/var/log/v2ray/access.log",
    "error": "/var/log/v2ray/error.log",
    "loglevel": "warning"
  },
  "inbound": {
    "port": 9000,
    "listen": "127.0.0.1",
    "protocol": "vmess",
    "settings": {
      "clients": [
        {
          "id": "8d837310-8120-ca48-748e-830359e454b9",
          "level": 1,
          "alterId": 64
        }
      ]
    },
   "streamSettings":{
      "network": "ws",
      "wsSettings": {
           "path": "/v2ray"
      }
   }
  },
  "outbound": {
    "protocol": "freedom",
    "settings": {}
  },
  "outboundDetour": [
    {
      "protocol": "blackhole",
      "settings": {},
      "tag": "blocked"
    }
  ],
  "routing": {
    "strategy": "rules",
    "settings": {
      "rules": [
        {
          "type": "field",
          "ip": [
            "0.0.0.0/8",
            "10.0.0.0/8",
            "100.64.0.0/10",
            "127.0.0.0/8",
            "169.254.0.0/16",
            "172.16.0.0/12",
            "192.0.0.0/24",
            "192.0.2.0/24",
            "192.168.0.0/16",
            "198.18.0.0/15",
            "198.51.100.0/24",
            "203.0.113.0/24",
            "::1/128",
            "fc00::/7",
            "fe80::/10"
          ],
          "outboundTag": "blocked"
        }
      ]
    }
  }
}
配置nginx
安装
apt install nginx
配置/etc/nginx/conf.d/v2ray.conf,如下
/etc/nginx/conf.d# cat v2ray.conf

server {
    listen 443;
    server_name ip.address.of.your.vps;

    location /v2ray {
        proxy_redirect off;
        proxy_pass http://127.0.0.1:9000;
        proxy_http_version 1.1;
        proxy_set_header Upgrade $http_upgrade;
        proxy_set_header Connection "upgrade";
        proxy_set_header Host $http_host;
    }
}
为了允许访问者访问nginx站点,您需要打开端口80和443:
apt install -y firewalld
firewall-cmd --permanent --zone=public --add-service=http
firewall-cmd --permanent --zone=public --add-service=https
firewall-cmd --reload
配置V2rayX
启动v2rayx之后会有这样一个图标
点击Configure进入配置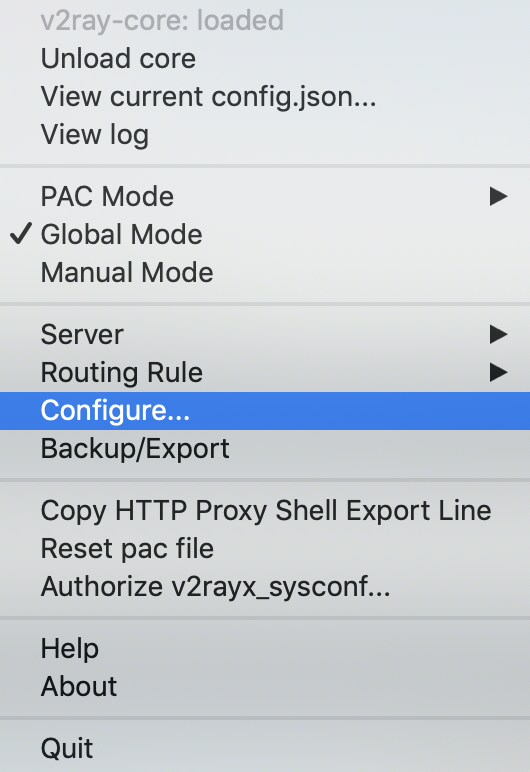
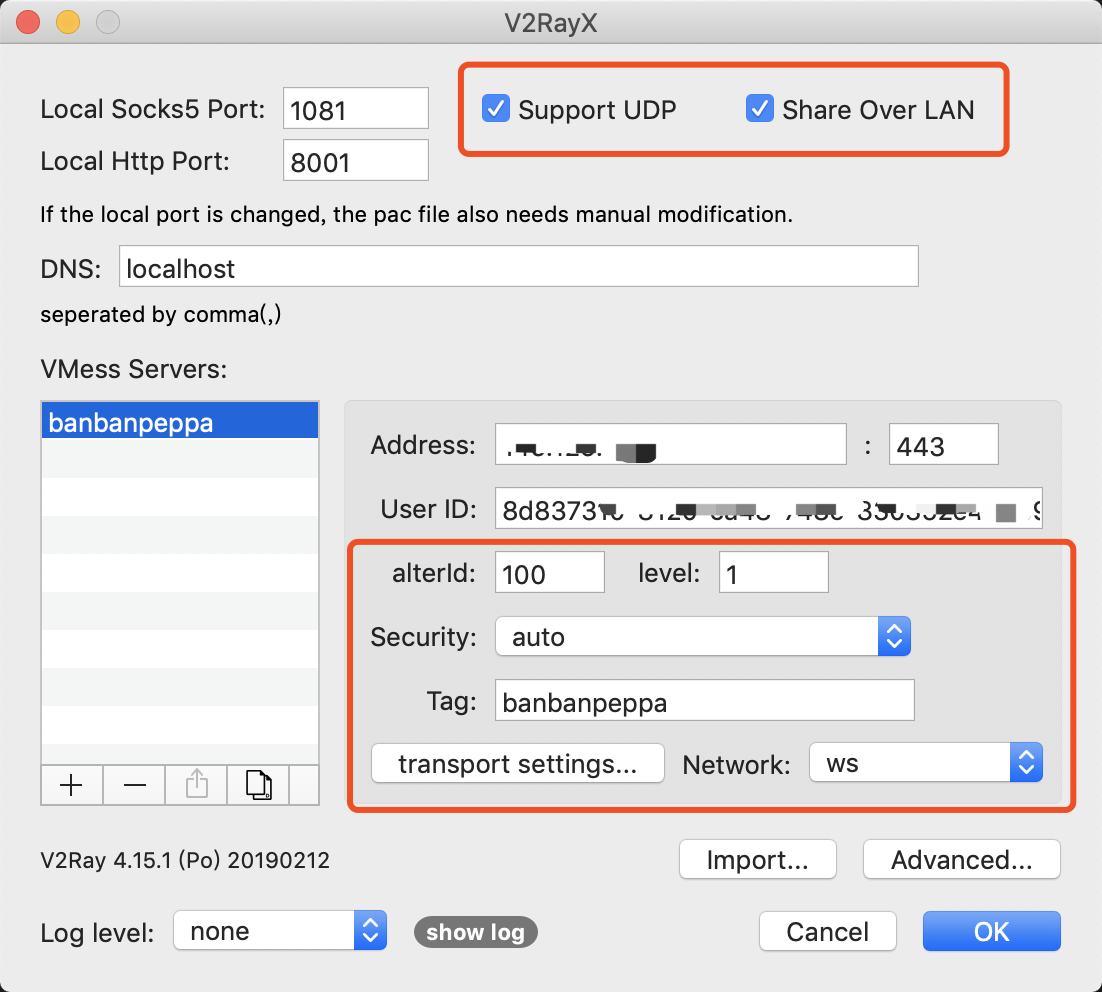
接下来点击transport settings进入配置
配置websocket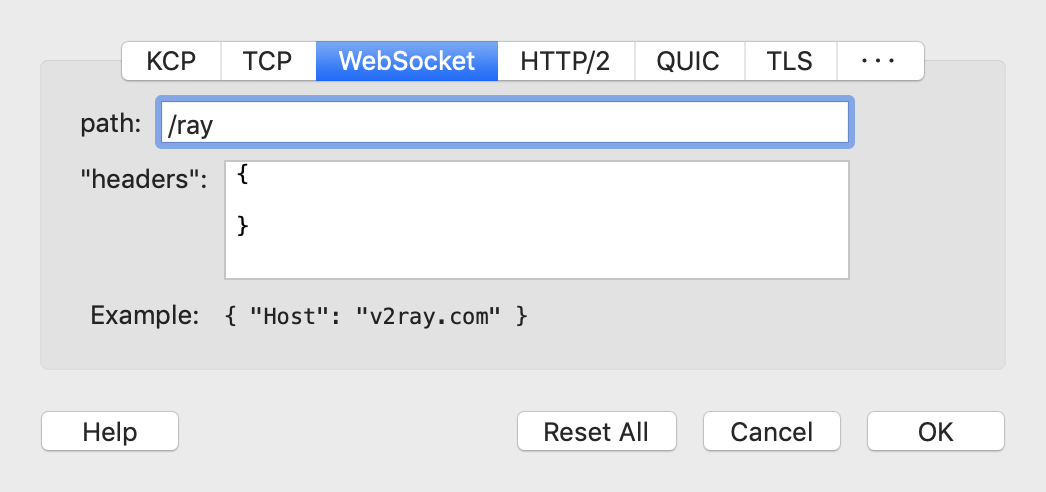
配置http/2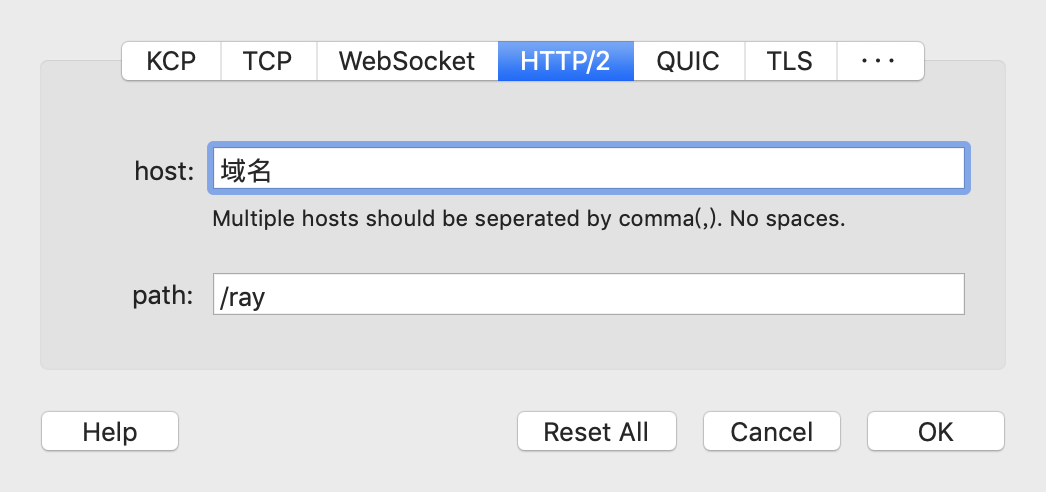
配置tls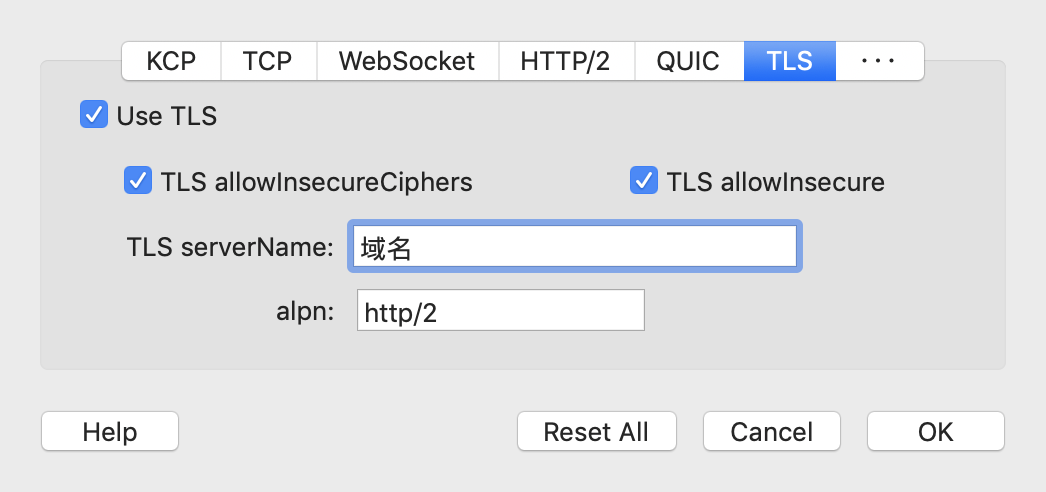
在开启服务端V2ray和nginx服务后,Google it!
Reference
- V2ray+websocket+tls+caddy+serverSpeeder
- 科学上网2.0:v2ray+websocket+nginx
- v2ray +tls + websocket + nginx 配置与使用